
How to Roast a Perfect Thanksgiving Turkey
Disclosure: Some of the links below are affiliate links, meaning that at no additional cost to you, I will receive a commission if you click through and make a purchase. Read my full affiliate disclosure here.
Thanksgiving is just around the corner, and that means that turkey is going to be at the center of countless feasts! I’m here to help you create a delicious, moist and picture-perfect turkey to grace your table this Thanksgiving!

If this is your first time roasting the turkey for your family feast or you are in need of a refresh (since it’s been a year!), this step by step guide with pictures is just what you need! The biggest thing to remember is that you can do this! Roasting a turkey is pretty simple, it just requires time, babysitting the bird, a good roasting pan , aluminum foil and a baster! There are so many ways to prepare a turkey- this is roasting in the oven and prepping the bird with butter and poultry seasoning!
What You Will Need:
A Whole Turkey
Aluminum Foil
1 lb salted butter
Poultry Seasoning
Small Bowl
Paper Towels
Instructions:
Step 1: Purchase a Turkey!
The possibilities when you purchase a turkey are endless! You can get fresh, frozen, organic, free range and anything else you can imagine! Most grocery stores carry frozen turkeys like Butterball. Fresh and/or organic turkeys usually cost more! Take your budget into consideration when figuring out which turkey to buy!
I would suggest purchasing your turkey, especially if you’re opting for a frozen one, at least a week before Thanksgiving so you’re not reenacting the scene from Christmas with the Kranks where Nora is racing through the grocery store to get the last Honey Ham! You will also still have time to thaw the turkey!
When purchasing a turkey, you need to choose a size that makes sense for the number of people that you will be feeding! Here is a link from Butterball where you can enter how many adults and kids are eating and if you want leftovers and it will tell you how big of a turkey to purchase! A general rule is to allow for 2 lbs of turkey per adult and 1 lb of turkey per child. The size of the turkey will affect how long you cook it!
Step 2: Thaw Your Turkey
If you purchased a fresh turkey, skip this step! If not, the last thing you want on Thanksgiving Day is a frozen or partially-thawed turkey (I speak from personal experience and it did NOT go well!)
This is the first time that planning ahead will be crucial. There are two ways you can thaw your turkey- in the refrigerator (days ahead of Thanksgiving) or submerged in cold water!
In the refrigerator, allow 1 day of thawing per 4 pounds of meat (so a 20 lb turkey would need to be in the fridge 5 days before Thanksgiving). Once thawed, a turkey will still be good for up to 4 days in the refrigerator!
If you have less time, you can thaw the turkey in cold water! A large sink in the laundry room or clean 5 gallon bucket will do the trick! Allow 30 minutes in cold water per pound. So, if you have a 20 lb turkey that is 600 minutes, which is 10 hours. You will want to rotate it every hour or so!
For more detailed information about specific thawing times, check out the link from Butterball about defrosting!
Step 3: Make a cooking schedule for your turkey!
This might seem like an unnecessary step, but it saves so much stress, and mental energy later, especially if you are cooking other items at the same time! The past few Thanksgivings I’ve had one oven to cook everything in, so I had to make a schedule to ensure everything would be done in time! If you have a double oven, you can cook the turkey in one oven and other dishes in the second oven and that works out great! If you have one oven, I highly recommend making the turkey first because it takes the longest! I also recommend putting a buffer of about an hour on the end, just in case!
How to Make a Turkey Cooking Schedule
Figure out how long your turkey needs to cook! This will be based on how large your turkey is! Here is the calculator on the Butterball website! note: this blog post is about how to roast a turkey without stuffing inside! I cook stuffing separately and add it once the turkey is cooked!
Decide what time you are eating the meal (or need to leave the house to take it somewhere else)
If you are cooking other dishes and only have one oven, subtract that amount of time it will take to cook the other dishes, and plan backwards.
Write down what time you will put the turkey in the oven, and the number of times you will need to baste the turkey. For example, if the turkey needs to cook for 4 hours and you need to leave for your in-law’s house at noon, plan on getting the turkey out of the oven at 11 (just in case it needs a little extra cooking time). That means you will put the turkey in the oven at 7 am.
Based on what time you need to get the turkey in the oven, begin prepping the turkey 20-30 minutes before that time.
Once the turkey is in the oven, you will let it roast for 1 hour and 30 minutes uncovered and undisturbed, then you will baste it and tent it with aluminum foil.
Then, baste every 20-30 minutes until the turkey is done (the breast will be 170 degrees Fahrenheit when it is done!)
Step 4: Preheat the oven to 325 degrees
Once you figure out what time you need to get the turkey in the oven, allow 20-30 minutes to prep the turkey to put in the oven! It always takes longer than you think it will!
Step 5: Make the butter for the butter bath!
Place 1 lb of salted butter (softened, NOT melted) and about 1 Tbsp of Poultry Seasoning into a small bowl. Mix the butter and the seasoning together with your hands until blended, soft and creamy. Set aside.


Step 6: Unwrap the Turkey
In a clean kitchen sink, carefully open the turkey packaging with kitchen scissors or a small, sharp knife, being careful not to nick the skin of the turkey! Pour out any raw juices and dispose of the wrapper.


Make sure that the turkey is completely thawed at this point! If it is still frozen in places, you will need to thaw it more because it will not cook completely if it is still partially frozen!
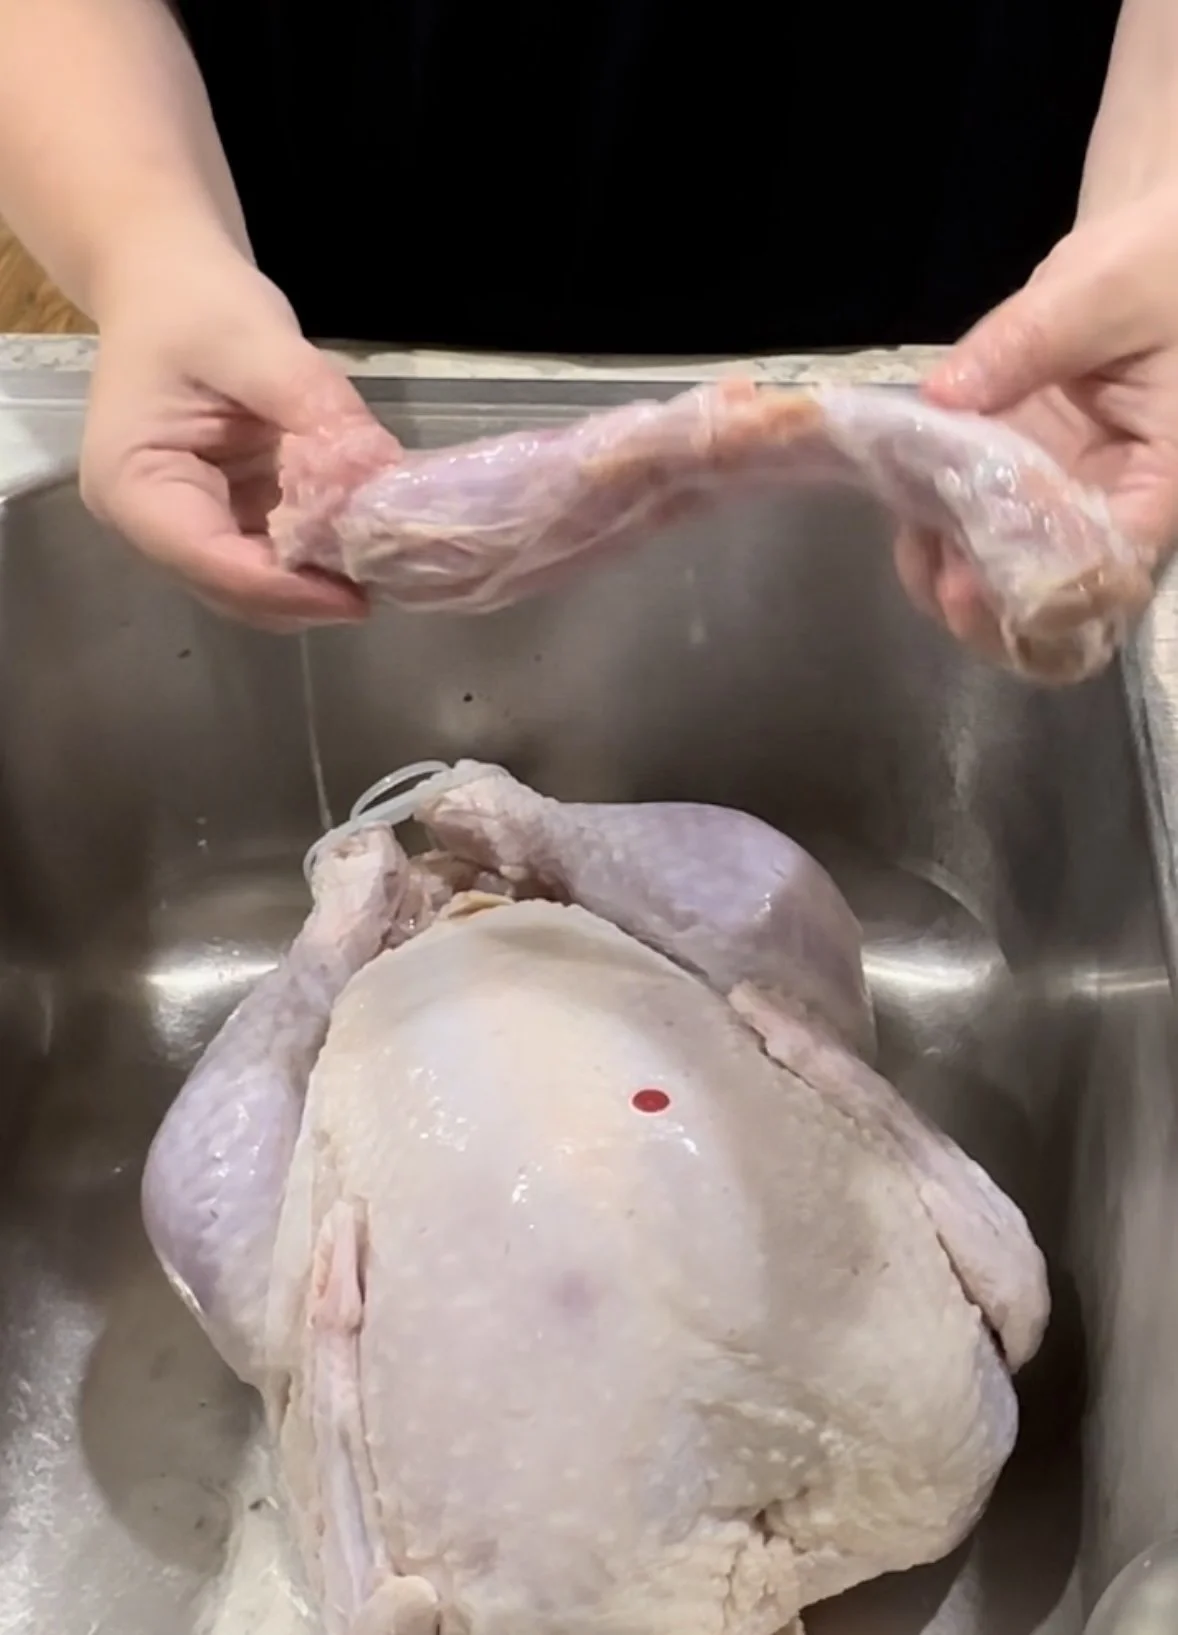
Step 7: Remove the Neck and Giblets
Reach into the cavity of the turkey and remove whatever is in there! The organs may be loose or they may be in a packet. Also remove the turkey neck. Some turkeys may also have a packet that can be used to make gravy. You can either dispose of all of this or keep it. My mom likes to boil the turkey neck for the tender meat to add to gravy. I have never done that, but that is a thing if you want to do it!

Step 8: Rinse the Turkey
There are mixed opinions on whether or not you should rinse poultry, but I like to give my turkey a good rinse in the sink to get off any of the raw juices. It’s never affected the turkey negatively to my knowledge!

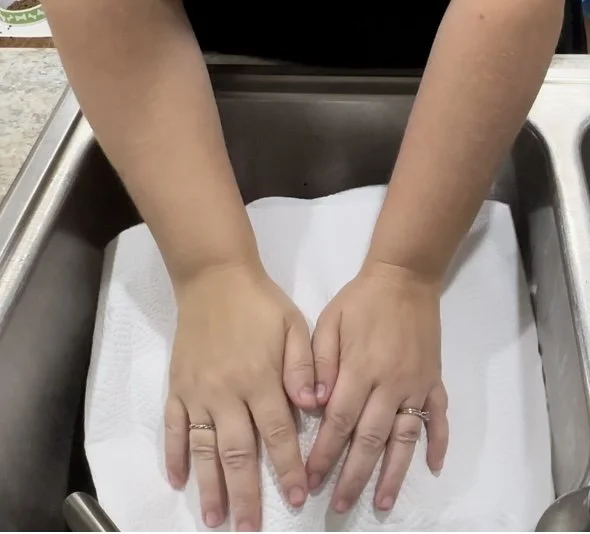
Step 9: Dry the Turkey
Using clean paper towels, pat the turkey dry. You don’t want water on the turkey when you give it a butter bath- this will make it slimy and gross!
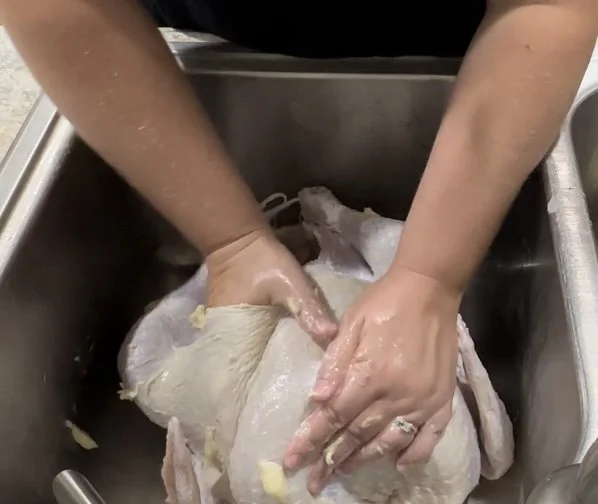
Step 10: Give the Turkey a Butter Bath
This is where you are going to get your hands dirty! Get a glob of butter and, using your hands, spread it on the outside skin of the turkey. Massage the butter into the turkey’s skin all over the surface of the turkey (you don’t have to do the underside) until it is well covered. Then, take butter in your hands and gently spread the butter under the skin of the turkey, between the skin and the meat, particularly on the turkey breasts. Be gentle- you don’t want to tear the skin. Don’t rush this step! Take your time and really massage the turkey with the butter! It usually takes me about 7-8 minutes.

Step 11: Put the Turkey in the Oven
Place a roasting rack inside of a large roasting pan, then transfer the buttered bird into the roasting pan! The roasting rack will keep the turkey from sticking to the bottom of the pan, will allow the juices to have somewhere to go and will help to ensure an even roast!

Cook, uncovered, at 325 degrees for 1 hour and 30 minutes.
Once the turkey is in the oven, thoroughly wash and disinfect your sink and any areas that you touched or came in contact with the raw turkey! Kitchen safety is important and you don’t want anyone to get sick!

Step 12: Baste and Tent the Turkey
Remove the turkey from the oven and baste it! This will be the first of many bastes! Using the bulb baster, suck up any juices that are in the bottom of the pan or inside the turkey cavity and squeeze them out over the surface of the turkey. Do this for about 30 seconds.

To tent the turkey, get about a 2 foot long piece of aluminum foil and make a loose “tent” over the top of the turkey. It should not touch the top of the bird (I fold mine in half on top). It does not have to be perfect! The tent will help the turkey stay moist and keep it from getting too brown!
Return the tented turkey to the oven.
Step 13: Baste, baste, baste
Baste the turkey, removing and replacing the tent, every 20-30 minutes until the turkey is done! The total cooking time depends on the size of the turkey. The one I made needed 3.5 hours!
Step 14: Check to Make Sure the Turkey is Done!
If your turkey came with a timer, or you inserted one, you want to make sure the timer has popped up before you consider the turkey done! However, the turkey timers aren’t always 100% accurate, so you want to take the temperature of the turkey breast with a meat thermometer and it should read 170 degrees! If it isn’t quite done, cook for 15-20 more minutes and then take the temperature again!
Step 15: Move the Turkey onto a Serving Platter
Once the turkey has cooled a bit, you can either transfer the entire bird to a serving platter, or you can carve it in the roasting pan and put the pieces onto a serving plate!
I like to put the entire bird on a serving platter with some garnish and dressing that is already cooked! I used parsley in these photos! I like to have the turkey on the table for that Norman Rockwell moment!


I hope you enjoyed roasting your turkey and you and your family (or friends!) enjoyed eating it!
Let me know how your turkey turned out!
Stay tuned for more Thanksgiving recipes in the coming weeks!
