
How to Make Buttermilk Biscuits
Disclosure: Some of the links below are affiliate links, meaning that at no additional cost to you, I will receive a commission if you click through and make a purchase. Read my full affiliate disclosure here.
Biscuits are an American tradition! There are so many variations and ways to make biscuits! I’ve tried lots of them and they are so tasty! Biscuits can be served with breakfast, as a part of a yummy breakfast sandwich, with soup, with gravy or as a bread with a home cooked dinner!
I came across this way of making biscuits with buttermilk during the pandemic! I was pregnant with our son for most of 2020 so I spent a lot of time trying new recipes in my kitchen and trying to make those days as fun as possible for my family! Mrs. Brenda, a precious and spunky elderly lady who owns a Bed and Breakfast in Andalusia, Alabama, taught me this technique! Her video is awesome and is on Facebook if you want to find it!
The thing about this recipe is that there are no exact measurements for anything, which I don’t typically prefer. The way this biscuit dough comes together is magical, though! It’s like the flour, buttermilk and shortening just know how to combine themselves. When you get these delicious biscuits out of the oven, they will be pure Southern goodness! I think they even rival Cracker Barrel for taste. They are light, fluffy and flaky.
Here is everything you need to know to make Buttermilk Biscuits!
You Will Need:
Large Mixing Bowl (A large, more shallow bowl works really well- this is the wooden bowl I use)
Wooden Spoon or Spatula
Biscuit Cutter or Round Cookie Cutter (here is a link to biscuit cutters!)
Ingredients:
There are no exact measurements for this recipe. The more of each ingredient you use the more biscuits you will have. If you only have a little of each, you can make a partial batch of biscuits. I would recommend at least 2 cups of flour, about a cup of buttermilk and a small handful of shortening.
Self-Rising Flour
Buttermilk
Shortening
Instructions:
Step 1: Preheat the oven to 500 degrees.
Yes, you read that correctly, 500 degrees. I didn’t even know my oven could get that hot, but that is the magic temperature for these delicious biscuits! They won’t burn to a crisp, I promise!
Step 2: Using your hand, smear some shortening onto the surface of the cast iron skillet.
This will keep the biscuit dough from sticking to it!

Step 3: Pour desired amount of self-rising flour into a large bowl.
Apparently in the Deep South, there is such a thing as a biscuit bowl, which just stays full of flour and you cover it and use it over and over again. I feel like this made more sense in previous generations when our great-grandmothers were making homemade biscuits every single day, maybe multiple times a day! This also ensured that flour didn’t go to waste. In 2023, because we aren’t measuring (although I recommend at least 2 cups), you will probably have flour that you will discard at the end.

Step 3: Using a wooden spoon or spatula, make a “well” in the middle of the flour.

Step 4: Pour buttermilk into the well in the flour.
Fill it just under the top of the well so it stays in a nice little circle.

Step 5: Using your hands, scoop out a large handful of shortening and form it into a ball.
It will look like a snowball!

Step 6: Put the ball of shortening into the middle of the buttermilk well!

Step 7: Using your hand, mix together the shortening, buttermilk and flour.
You want to be sure the ball of shortening is really broken up and mixed well! The dough is going to be super sticky!

Step 8: Once you have a sticky dough that is loosely formed, remove the dough (and any extra pieces of dough) from the bowl into a pile on a clean countertop.
(My biscuit dough and countertop blend in together ha ha!)

Step 9: Using a spatula or wooden spoon, scrape off the dough stuck to your hand and add it to the pile.
Using any extra flour from the bowl, lightly coat your hands with flour, then sprinkle some flour over the dough and around the dough pile on the countertop.
Step 10: Combine the dough by briefly kneading the dough together.
This looks like folding it in on itself, squishing it together, until it is all one piece and one consistency.

Step 11: Pat the dough to about a 1-1.5 inches thick large circle.
You don’t want the dough to be too thick because you want the biscuits to cook properly!

Step 12: Wash your hands!
At this point, I’m done having super sticky hands and so I start with a clean slate. You will continue handling the dough so I also feel like it is a good idea to wash your hands at this point anyway!
Step 13: Cut your biscuits with a biscuit cutter or round cookie cutter!
The only downside to using a cooking cutter is that they are usually not as tall as a biscuit cutter, so the cookie cutter might disappear in your dough. I know this from experience! Shout out to my brother in law (who is also a great cook!) for gifting me with my biscuit cutters!


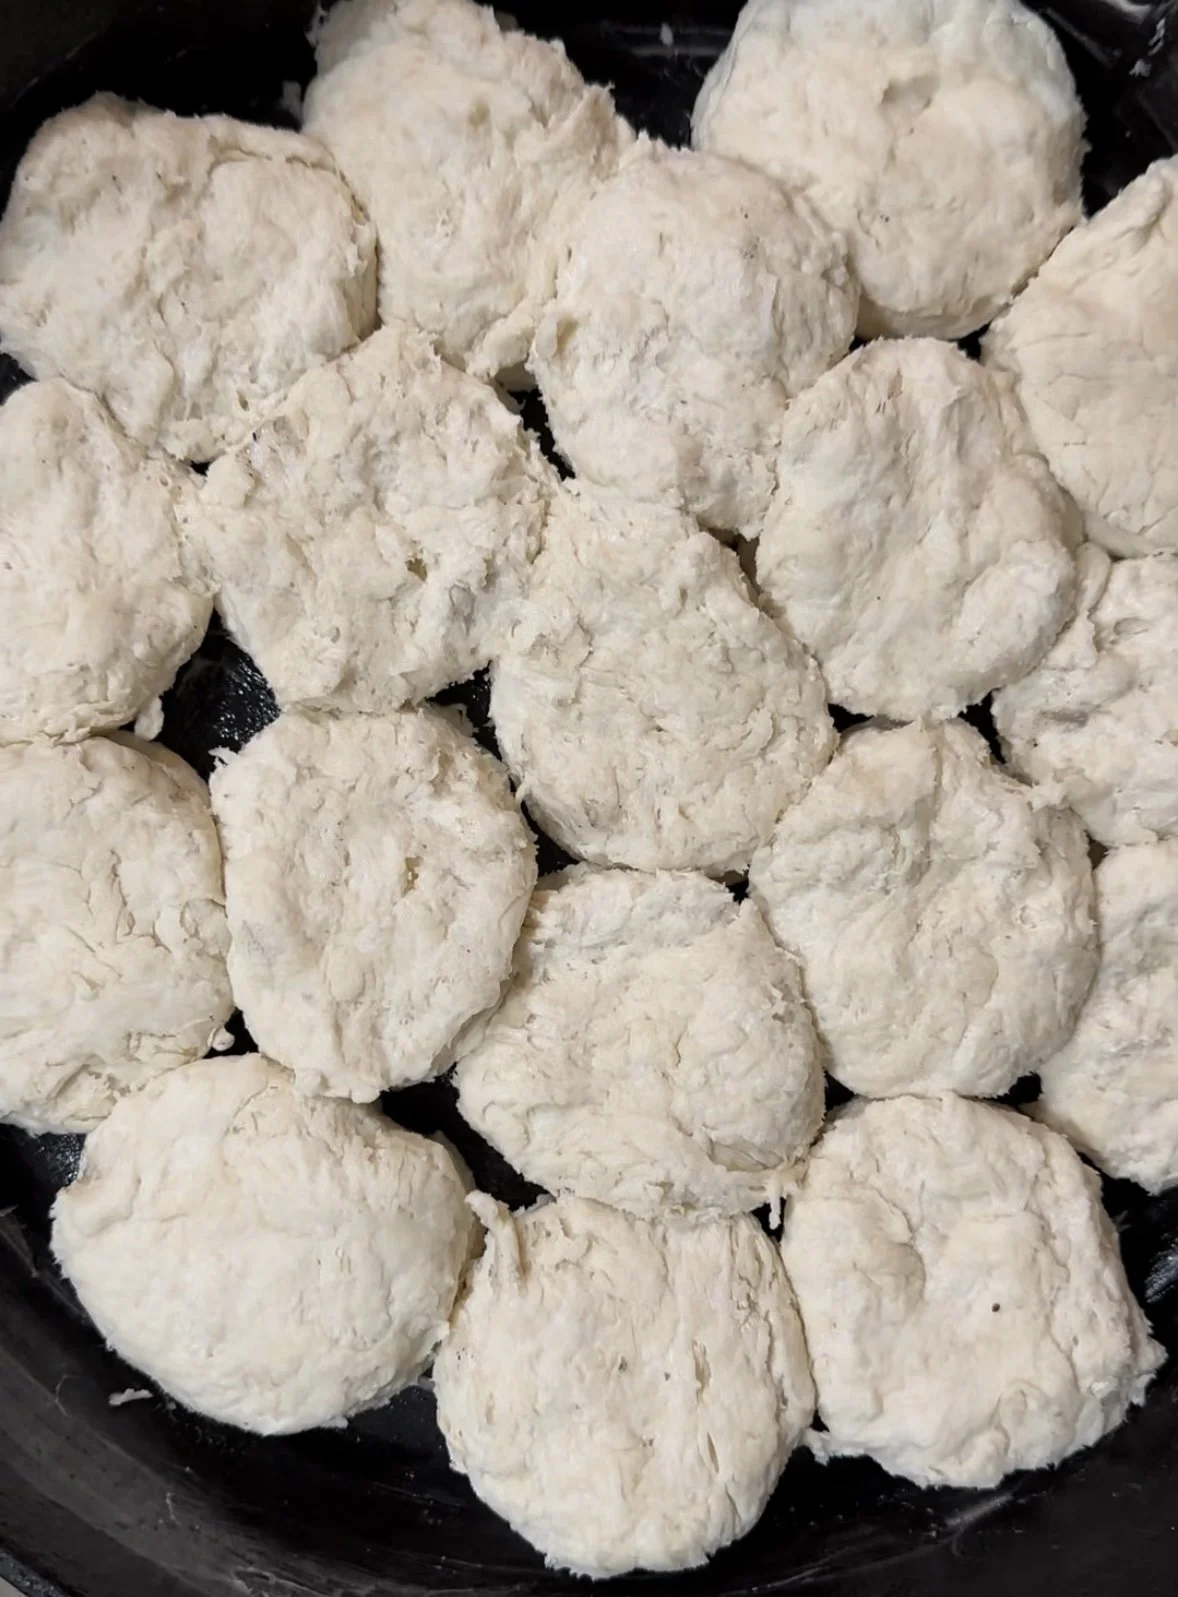
Step 14: Place the biscuit rounds in your cast iron skillet.
Start from the outside and work your way in. Make sure the edges of the biscuits are either touching the edge of the skillet and/or another biscuit. This will help them rise! Photo is what a full skillet of biscuits should look like! You can work with them to make them fit!
Step 15: Repeat Steps 10-14 until the skillet is full or until you have no more biscuit dough left!
Step 16: Bake the Biscuits!
Carefully put the biscuits in the 500 degree inferno for 10-12 minutes. Watch them carefully. You want the biscuits to be golden brown on top. If they are getting golden and its only 8-9 minutes in, loosely lay a sheet of aluminum foil on top to prevent further browning! The pan I made today needed every second of the 12 minutes to be done in the middle.
Step 17: Remove the biscuits carefully from the oven!
Make sure that handle is covered and you don’t burn yourself on the skillet! You can serve the biscuits directly from the cast iron or remove them to a separate serving dish.


Austin gave me this pewter bread tray for Christmas when our oldest daughter was a year old. We were really struggling financially at the time so we had agreed not to get each other Christmas presents that year. Little did I know that, on a trip to visit my dad in the fall, he was at an antique shop getting a family vase priced out and he saw this bread tray. My grandparents had one really similar to it that always had rolls, biscuits, cornbread, muffins or toast in it and I told him how much I loved it. The tray didn’t cost but a few dollars, but he presented it to me that Christmas and to this day it is the best Christmas present he’s ever given me! It serves as a reminder to me of the Lord’s provision and the blessing of food on my table!

Enjoy your biscuits with fresh butter, preserves, or like Austin did this morning, sausage! Biscuits freeze really well if you need to make them ahead of time too!